How to Make Homemade Ladyfingers (Light, Airy & Structurally Perfect)
- Francis

- Apr 28
- 5 min read
Updated: Apr 30
Homemade ladyfingers are light sponge biscuits made without chemical leavening, relying entirely on whipped eggs for structure. Softer and more absorbent than store‑bought versions, they are the ideal foundation for tiramisu and other layered desserts where texture is critical. There is a world of difference between store-bought biscuits and the delicate, cloud‑like texture of homemade ladyfingers. While these light sponge biscuits are a snackable classic on their own, they are also the essential foundation for a truly world‑class tiramisu. Understanding how they are made — and how they differ from their sturdier Italian cousin, the Savoiardi — is the first step toward mastering the art of sponge‑based desserts.
As a chef, I’ve found that ladyfingers are often treated as a “store‑bought is fine” ingredient. And while convenience has its place, this mindset is usually what holds home bakers back from great desserts. When you make ladyfingers from scratch, you control the moisture content, the structure, and most importantly, how they behave once soaked. This control is essential if you don’t want your dessert to collapse into a soggy puddle.
Homemade ladyfingers are softer, lighter, and more absorptive than packaged versions. They take on flavor without disintegrating, creating that signature melt‑in‑the‑mouth texture. If you care about texture — and great tiramisu lives or dies by texture — these are non‑negotiable.

It’s All About the Air
Before we talk flour, sugar, or oven temperatures, we need to talk about air. A ladyfinger is essentially a sponge cake piped into shape. There is no chemical leavening here, no baking powder, no baking soda. Every bit of lift comes from air trapped in whipped eggs. This is why technique matters more than ingredients.
The Ribbon Stage Explained
When you whip your egg yolks with sugar, you’re not just mixing — you’re building structure. The goal is the ribbon stage: the mixture becomes pale, thick, and when you lift the whisk, it falls back into the bowl in a slow, ribbon‑like stream that sits on the surface for a few seconds before dissolving. This tells you the sugar is dissolved and enough air has been incorporated.
The Fold (Where Most Things Go Wrong)
The folding stage is where most home bakers lose the battle. Once flour enters the bowl, aggressiveness is your enemy. Stirring pops the air bubbles you worked so hard to create.
Use a large rubber spatula. Cut straight down through the center, lift from the bottom, and gently turn the mixture over itself. You’re not mixing — you’re protecting air. If you rush this step, your ladyfingers will bake flat, dense, and chewy instead of light and crisp.
Ingredients (Classic Sponge Formula)
This classic ladyfingers recipe uses just eggs, sugar, flour, and vanilla — technique, not ingredients, does the heavy lifting.
4 large eggs, separated, room temperature
100 g granulated sugar (½ cup), divided into two 50 g (¼ cup) portions
125 g all‑purpose flour (1 cup), sifted
1 tsp vanilla extract
Pinch of salt
Powdered sugar, for dusting
Step‑by‑Step Method
Follow each step carefully to preserve air in the batter — ladyfingers succeed or fail based on handling, not timing shortcuts.
1. Preparations
Preheat your oven to 180°C / 350°F. Line two baking sheets with parchment paper. If piping evenly feels intimidating, draw 10 cm (4‑inch) guide lines on the underside of the parchment.
2. The Yolk Base
In a large bowl, beat the egg yolks with 50 g sugar (¼ cup) and the vanilla extract (1 tsp) until thick, pale, and at full ribbon stage.
3. Whip the Meringue
In a clean, grease‑free bowl, whisk the egg whites with a pinch of salt until soft peaks form. Gradually add the remaining 50 g sugar (¼ cup) and continue whisking until stiff, glossy peaks form.
4. Combination
Fold about one‑third of the whipped egg whites into the yolk mixture to loosen it. Sift in half of the flour (125 g / 1 cup total) and fold gently. Add the remaining whites, then sift in the remaining flour. Fold only until no dry flour remains.
5. Piping with Precision
Transfer the batter to a piping bag fitted with a 1.5 cm (⅝‑inch) plain round nozzle. Pipe 10 cm (4‑inch) fingers, leaving 3 cm (1¼ inches) of space between each.
Chef’s SecretDust the biscuits generously with powdered sugar. Wait 2 minutes, then dust again. This second coating creates the classic crackled surface and prevents excessive spreading.
6. Bake
Bake for 12–15 minutes until lightly golden and firm to the touch. Let the ladyfingers cool completely on the tray — they will crisp as they set.


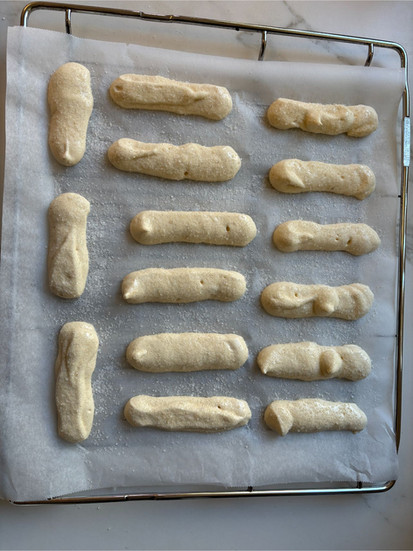


Images: step-by-step making of home-made Ladyfingers.
Ladyfingers vs Savoiardi: Know the Difference
These ladyfingers are intentionally light and slightly tender. They’re perfect for soaking and layering. Traditional Italian Savoiardi, however, are drier, more rigid, and built specifically for long soaks without deformation. If you’re looking for that authentic Italian version, continue to Authentic Savoiardi Recipe (Original Italian Recipe).
The Ultimate Utility Biscuit
While ladyfingers are lovely with coffee, their true role is structural. They are the DNA of classic desserts — tiramisu, charlottes, trifles, and layered creams. Because these are homemade, they absorb liquid gradually and evenly, giving desserts a refined, professional texture.
The most iconic application, of course, is tiramisu. Homemade ladyfingers soak up espresso without collapsing, creating layers that are creamy, defined, and impossibly delicate. See 3: Authentic Tiramisu with Cooked Eggs (Original Italian Method) for the full build.
Pro Storage Tip
Store completely cooled ladyfingers in an airtight container immediately. If they soften, a 5‑minute refresh at 150°C / 300°F will restore their snap.
Nutritional information
Total yield: approx. 30 small homemade ladyfingers or 12 XL ladyfingers.
Nutrient | XL Serving (1⁄12 Batch) | Normal Serving (1⁄30 Batch) |
Calories | 85 kcal | 34 kcal |
Protein | 3.3 g | 1.3 g |
Fat | 1.0 g | 0.4 g |
Carbohydrates | 16.5 g | 6.6 g |
Sugars | 10.0 g | 4.0 g |
Fiber | 0.5 g | 0.2 g |
Sodium | 25 mg | 10 mg |
Salt | 0.075 g | 0.03 g |
FAQ – Homemade Ladyfingers (Troubleshooting & Technique)
Why are my homemade ladyfingers flat or dense?
Flat or dense ladyfingers are almost always the result of lost air. This can happen if the egg whites are under‑whipped, over‑mixed during folding, or if the batter sits too long before piping. Ladyfingers rely entirely on air from whipped eggs, so gentle folding and immediate baking are essential.
Are homemade ladyfingers better than store‑bought for tiramisu?
Yes. Homemade ladyfingers are softer, lighter, and more absorbent than packaged versions. They absorb espresso evenly without collapsing, giving tiramisu cleaner layers and a delicate, melt‑in‑the‑mouth texture that store‑bought biscuits cannot achieve.
Can I use these ladyfingers as a substitute for Savoiardi?
Yes, but with intention. These homemade ladyfingers are lighter and more tender than traditional Italian Savoiardi, which are drier and sturdier. They are ideal for shorter soaks or desserts where a softer texture is preferred. For long soaks, dip briefly rather than saturating fully.
Why do ladyfingers need to be topped with powdered sugar before baking?
The powdered sugar creates a thin surface barrier that helps the ladyfingers rise evenly and develop their classic crackled top. The second dusting also prevents excessive spreading and improves structure during baking.
How should homemade ladyfingers be stored?
Once fully cooled, store ladyfingers in an airtight container at room temperature. If they soften, a 5‑minute refresh at 150°C / 300°F will restore their crisp exterior. Properly stored, they hold their structure well for dessert assembly.


Comments