Growing Red Robin Cherry Tomatoes: The Ultimate Hydroponic Guide
- Francis

- Apr 9
- 5 min read
Updated: Apr 17
Hydroponic gardening has revolutionized how we grow food, allowing urban dwellers and hobbyists to produce high-yield crops in tiny spaces. Especially in areas with cold winters, hydroponics provides the ability to grow and harvest fresh vegetables even in the dead of winter! Among the most rewarding plants for indoor systems is the Red Robin mini tomato. These compact, prolific "micro-dwarf" plants are perfect for countertop setups, providing a splash of bright red color and a burst of homegrown sweetness to your meals. In this comprehensive guide, we will walk through the entire lifecycle of a Red Robin tomato plant, covering the technical requirements and a week-by-week timeline for success. Interesting in hydroponic gardening, don't forget to read our other articles in the link.

Why Choose Red Robin Tomatoes for Hydroponics?
Unlike traditional cherry tomatoes that can vine up to 6 feet (180cm) tall, the Red Robin is a true micro-dwarf variety. It naturally tops out at just 8 to 12 inches (about 30cm). In a desktop hydroponics set-up, space is a premium, making this the gold standard for indoor "kitchen counter" gardening.
Key Benefits:
Space Efficiency: Fits perfectly under standard LED grow lights without needing a massive trellis.
High Yield: Produces a heavy crop of 1-inch (2.5cm) sweet, round tomatoes on a single tiny plant.
Determinate Growth: The plant grows to a specific size and produces its fruit all at once—perfect for small systems.
Aesthetics: Dark, rugose (textured) green foliage makes it look like a beautiful ornamental shrub.
Essential Hydroponic Equipment
Before you start, ensure you have your set-up ready.
Hydroponic System: A desktop unit like a LetPot or similar DWC/NFT system.
Grow Lights: Full-spectrum LED lights (aim for 14–16 hours of light per day in high power mode).
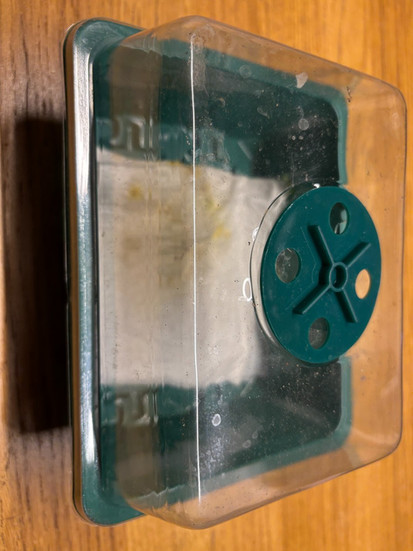
Growing Medium: Rockwool cubes or rapid rooters. For a "DIY" approach, we’ve had great success starting seeds in a closed container with wet paper towels!
Nutrients: High-quality hydroponic nutrient solution. Tomatoes are "heavy feeders"—they need Nitrogen for growth and a boost of Potassium/Phosphorus once they start flowering. We did not change their food during the whole growing cycle since we have a variety of fruits, vegetables and herbs in 1 container, that also works well.
Stage 0: Selecting the Right Breed
For desktop hydroponics, you must avoid "Indeterminate" varieties which grow like vines. Always look for "Micro-Dwarf" or "Determinate" seeds. While Red Robin is our favorite, other varieties like 'Tiny Tim' or 'Venus' can also work well. We sourced our seeds from specialist heirloom suppliers to ensure we got the genuine dwarf genetics.

Stage 1: Spawning and Germination (Days 1–10)
Tomatoes usually germinate faster than peppers, but they still love a controlled environment.
The Method: Place seeds in a container lined with wet paper towels. Cover with another damp towel and close the lid to trap humidity.
Temperature: Tomatoes germinate best between 21°C and 27°C (70 - 80°F).
The Goal: You should see tiny white roots (radicles) appearing within 3 to 7 days. Once the first "seed leaves" emerge, move them to your hydroponic pods.
We had a bad experience when we just started with hydroponics and try to spawn seeds in the hydroponic system itself. it has these small containers that they claim work, but only 1 out of 10 seeds spawned and also 4x slower then our DIY method. With our DIY method we had a 10 out of 12 success rate!
Stage 2: Seedling Development & Transfer (Weeks 2–6)
Once the roots are poking through the paper towel, move them to your system.
Transfer: Gently peel the roots from the towel. If they are stuck, tear the paper and plant the seed with the paper attached—it will decompose!
Light Height: Keep your LED lights approx. 4–6 inches above the plant. This prevents "legginess" and keeps the Red Robin nice and bushy.
Stage 3: Vegetative Maintenance (Weeks 6–10)
This is the growth spurt! The Red Robin will stay very compact but get very "leafy."
Pruning: Unlike garden tomatoes, do not prune the "suckers" (branches in the armpits) of a Red Robin. These branches carry your future fruit! Only remove yellowing leaves at the very bottom to improve airflow.
Water: Keep an eye on the reservoir. As the leaves grow, the plant will start "drinking" more water every day.
Stage 4: Flowering and Pollination (Weeks 10–15)
Soon, clusters of small yellow flowers will appear.
Be the Bee: Tomatoes are self-pollinating, but indoors they need help. Gently shake flower buds with a finger once a day. The flower buds are closed and you do not need to pollinate with a brush.
Nutrients: If your system allows, this is the time to ensure your nutrients are slightly higher in Potassium to support fruit development. Again, we did not do this since we are growing a variety of herbs, fruits and vegetables in 1 system.
Stage 5: Fruit Set and Ripening (Weeks 12–17)
This is the most exciting phase. The flowers will wilt, and tiny green beads will appear.
Support: Even though Red Robins are small, a heavy cluster of 20+ tomatoes can lean the plant over. Use a small bamboo skewer for support if needed.
The Wait: Tomatoes take time to turn red. Do not pick them when they are orange; wait until they are a deep, vibrant red and feel slightly soft to the touch.
Stage 6: Harvest and Senescence (Weeks 18–20+)
The Harvest
Pick the tomatoes individually or snip the whole cluster if they ripen at once. Homegrown hydroponic tomatoes have a much thinner skin than store-bought ones, so handle them gently!
The End of Life
Red Robin is a determinate plant. This means it puts all its energy into one big harvest and then naturally declines.
Senescence: Once the final tomatoes are picked, the leaves will begin to brown. This is normal.
Reset: Clean your reservoir with a light bleach or vinegar solution, flush the pump, and get your next round of seeds ready! If you do not want to run out of tomatoes, plant a new one every 5 weeks!


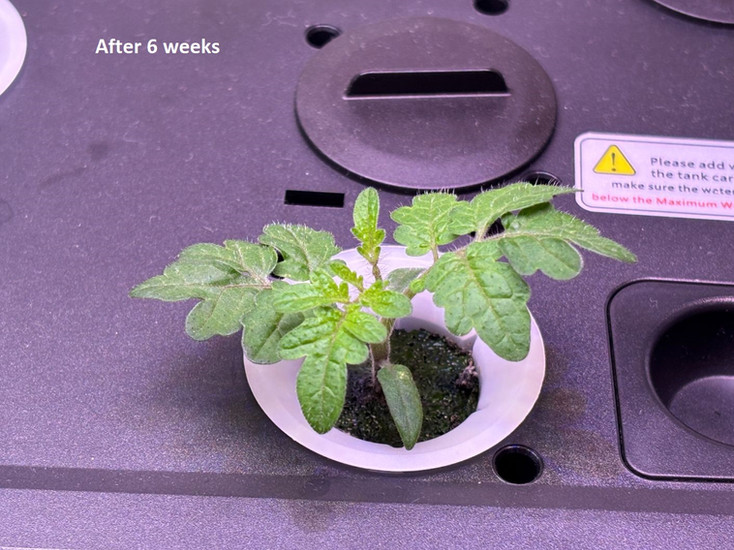


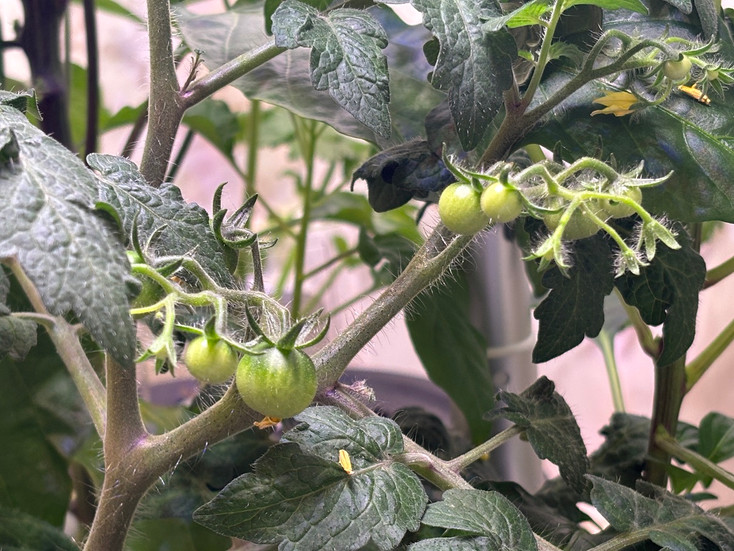
Images: step by step growing of Red Robin Mini tomato in a hydroponics set-up at home.
Growth Timeline Summary
Phase | Timeline | Key Tasks |
Germination | Days 1–10 | High humidity, warm spot (24°C). |
Seedling | Weeks 2–6 | Transfer to system, 16h light. |
Vegetative | Weeks 6–10 | Monitor water levels, keep lights low. Lower stem can look funny, these are root formation buds due to high humidity, its perfectly normal! |
Flowering | Weeks 10–15 | Hand-pollinate by shaking the plant. |
Fruiting | Weeks 12–17 | Watch for color change (Green -> Red). |
Harvest | Weeks 18–20 | Pick at deep red for maximum sugar. |
Clean Up | Weeks 20+ | Sanitize system for the next crop. |
Pro-Tips for High-Yield Tomatoes
Check pH: Tomatoes love a pH between 5.5 and 6.5. If the pH is too high, the leaves might turn yellow.
Light is Food: Red Robins can handle a lot of light. If the plant looks "sparse," move the light closer or increase the duration to 16 hours.
The pollinating trick: Pollinating with a gentle shake is good, but "buzzing" the flowers with a vibrating tool ensures almost every flower turns into a tomato.
Cooking with Hydroponic Red Robin Tomatoes
There is nothing quite like a tomato that was attached to the vine only 30 seconds ago. These mini tomatoes are sugar-bombs, perfect for:
Fresh Salads: Toss them whole into a Caprese salad with pearls of mozzarella.
Blistered Garnish: Pan-sear them for 2 minutes until they burst, then pour them over a grilled steak or chicken breast.
The Ultimate Snack: Honestly? Most of ours never make it to a plate—we eat them straight off the plant while working at the desk!
Addition to main dishes: like our healthy recipe for 15-minute Zucchini Pesto.
What are you growing in your hydroponic setup? Share your progress and your favorite tomato recipes in the comments below!


Comments